Xcode Provisioning – Without an Apple Developer Account
Sometimes, it’s not possible to add a new developer to your Apple Developer account.
Here’s how to set up a streamlined provisioning process that allows developers to register their devices and manage their provisioning profiles without needing access to the Apple Developer account.
Step 1a – Device Registration 📱
Collect all the deviceIds for phones/tablets/watches/CTVs your developer needs for testing.
To get a list of deviceIds connected via USB, run the following command in the terminal:
Assuming libimobiledevice is installed on your system, this will give a complete list. Xcode can also provide this information in the Devices and Simulators window.
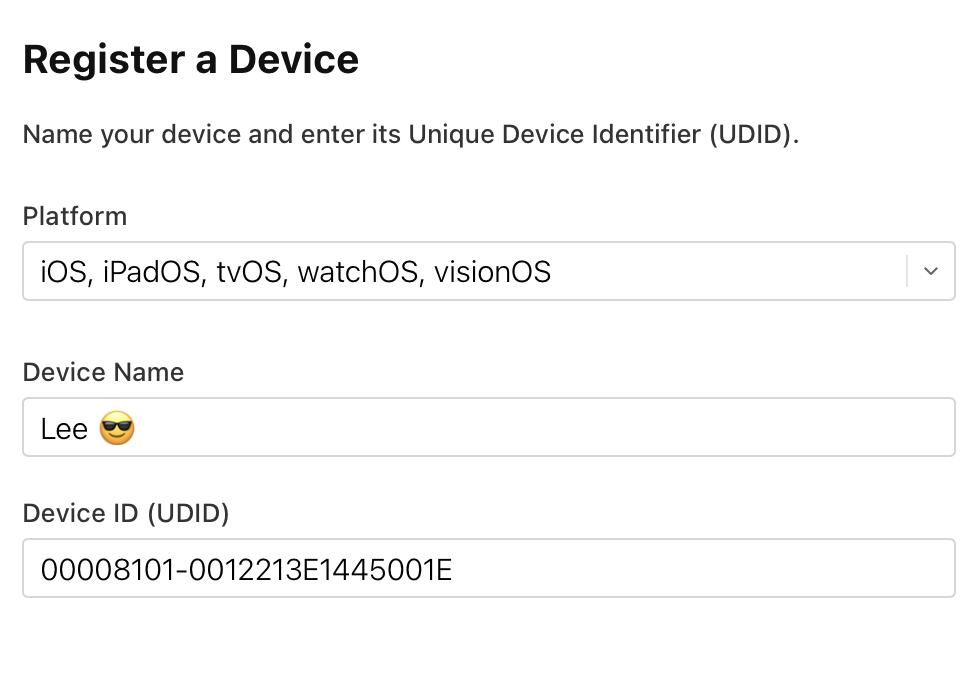
Step 1b – Device Registration 📱
Login to the Apple Developer Portal and navigate to the Devices section. Here’s a link straight there.
Register each device in the portal. You can do this by clicking the blue + button in the top left corner and entering the device name and UDID. Hint Device name can be anything you like, but the UDID must be correct.
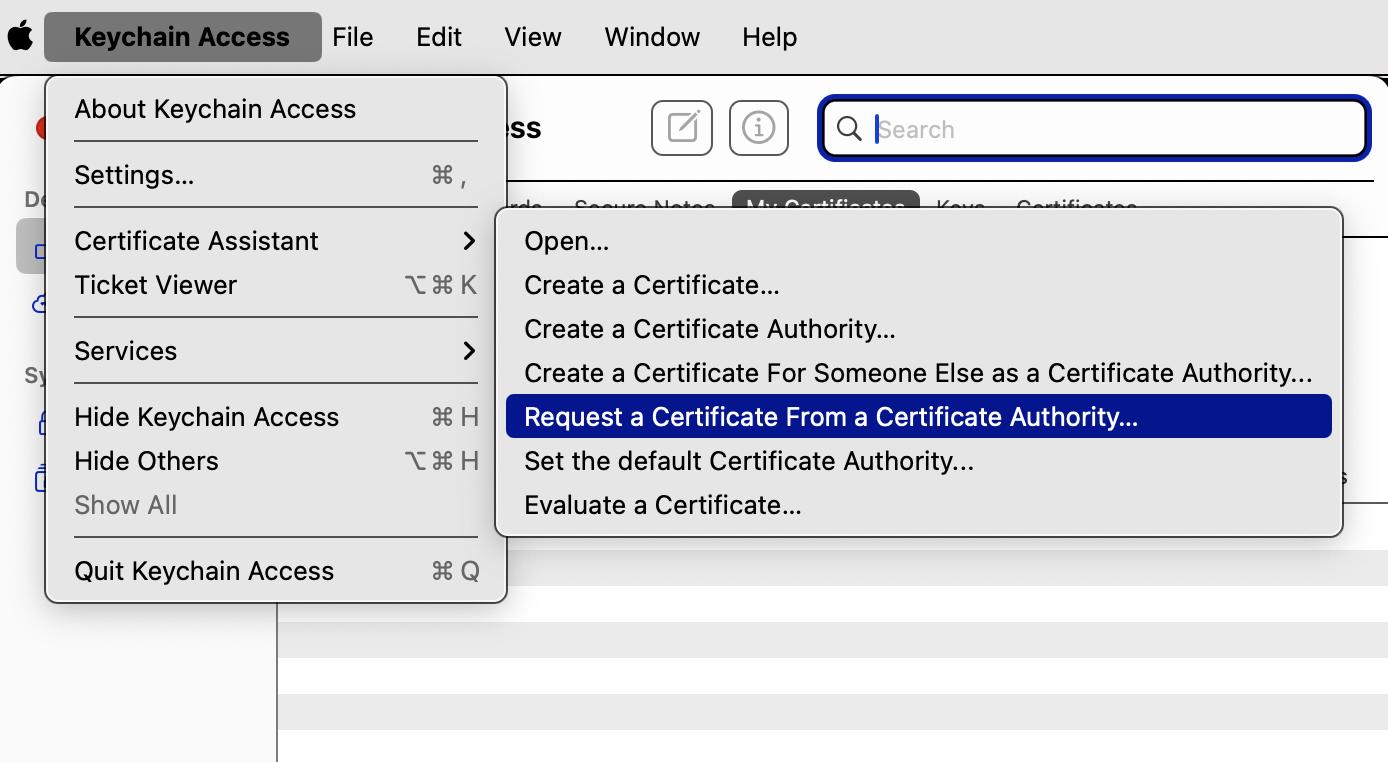
Step 2a – Keys + Certificates 🔑
Now for some lite cryptography. Create a Certificate Signing Request (CSR) using Keychain Access on MacOS.
Make sure to have Apple’s WWDR root certificate installed in your Keychain. Available here
curl -O https://developer.apple.com/certificationauthority/AppleWWDRCA.cer

This will also create a public/private key pair in the Keychain. The private key will be used later by Xcode to sign builds. Keep it safe.
Double click the certificate created in step 2b to install it in the Keychain. Xcode should be able to find it automatically.
Step 2b – Keys + Certificates 🔑
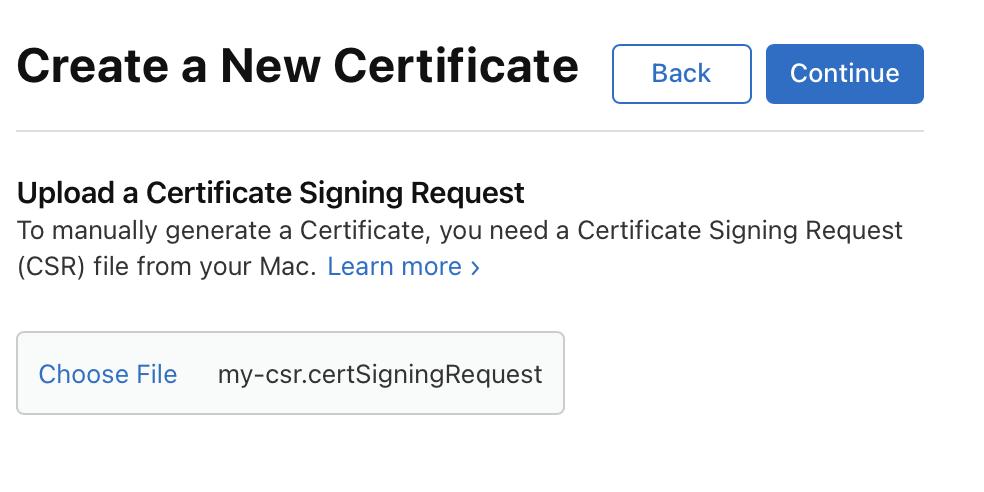
Use the CSR to create a new certificate in the Apple Developer Portal.
- Go to the Certificates section in the Apple Developer Portal.
- Click the + button to create a new certificate.
- Select the type of certificate you want to create. Under software – select either iOS App Development for debugging or iOS Distribution for App store distribution.
- Upload the CSR file created in Step 2a.
- Download the generated certificate. It should look something
like this:
Step 3a – Provisioning Profiles ❤️
There is no step 3a. 😅
Step 3b – Provisioning Profiles ❤️
Final step
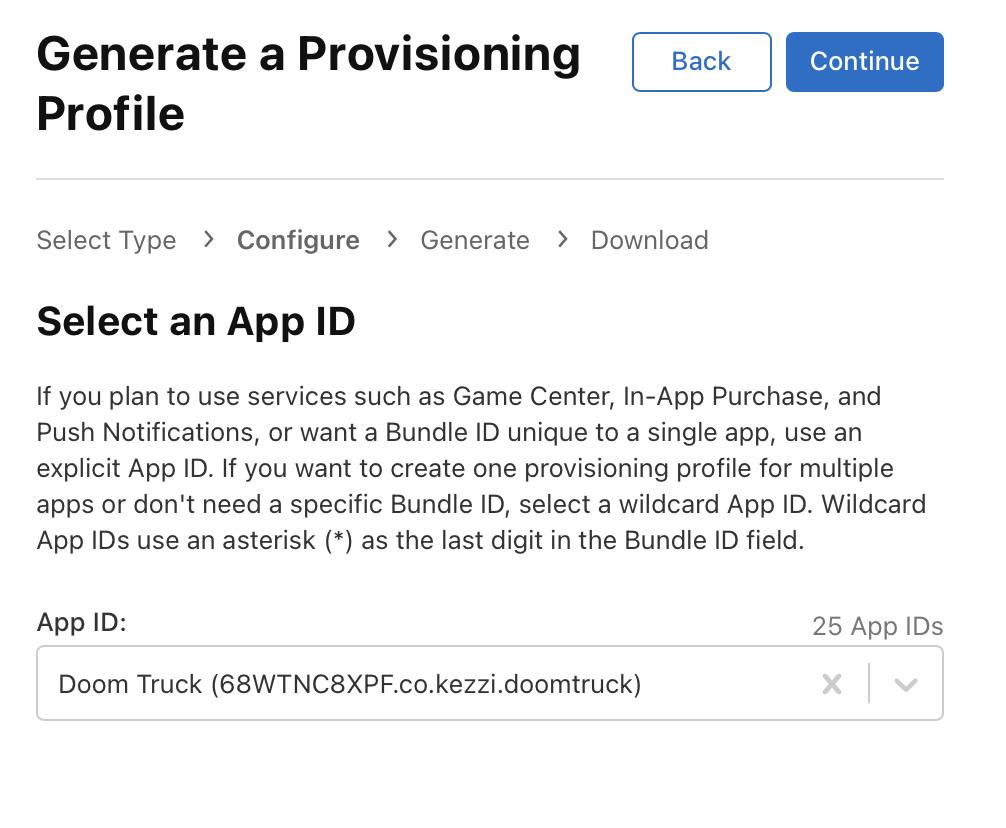
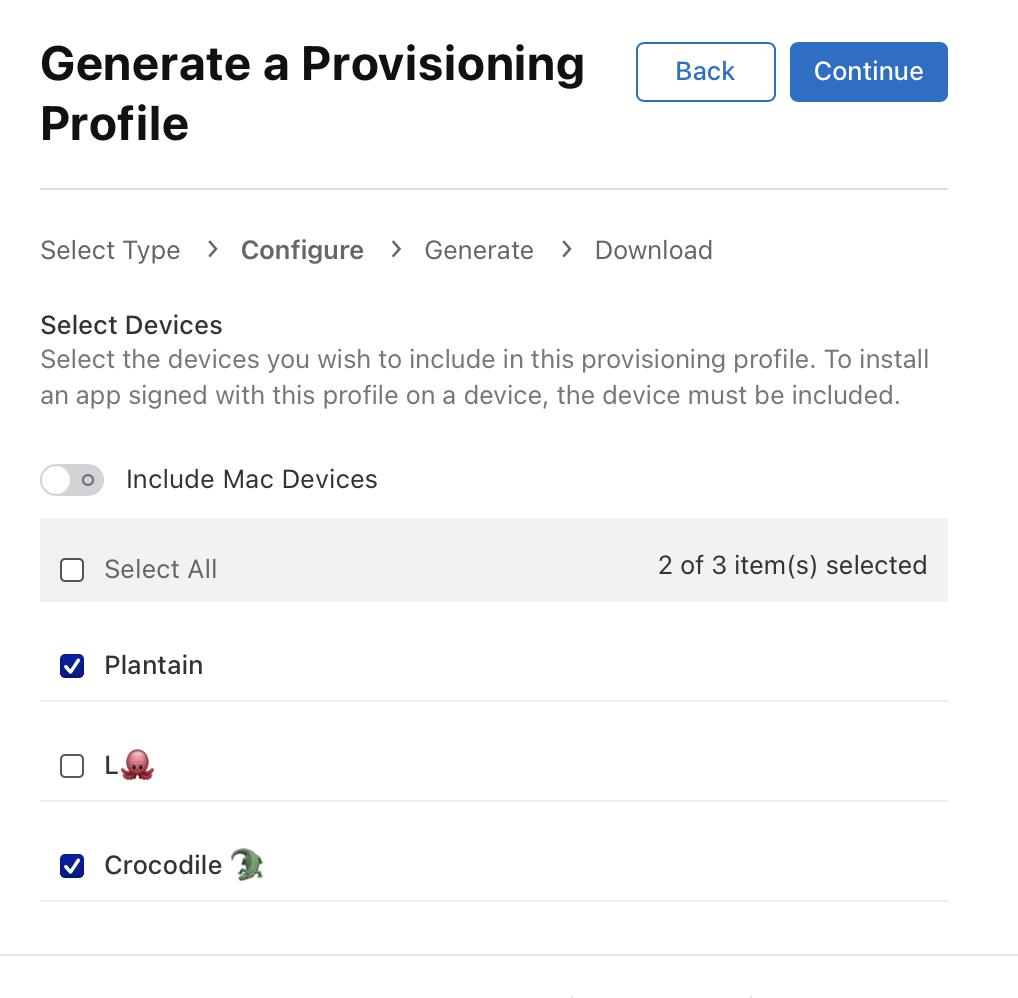
Create a provisioning profile in the Apple Developer Portal.
- Go to the Profiles section in the Apple Developer Portal.
- Click the + button to create a new provisioning profile.
- Select the type of provisioning profile you want to create. For development, select iOS App Development. For distribution, select App Store.
- Finally, select the correct App ID, devices from Step 1a, and the certificate from step 2a for this profile.

And that’s it! You can now download the provisioning profile and install it in Xcode.
But that’s a whole different story.
Need help with this? Want to find ways to automate this process?
I’m an expert.